

A passport that looks perfectly usable can still stop a first international trip at the check-in desk if its validity or visa requirement fails the airline’s document check. This first international trip checklist follows five moments when new travellers are most likely to feel uncertain: before booking, before departure, at security, during the first two hours after landing, and on the first day abroad.
It is written for first-time international travellers who need a calm, practical plan rather than a generic packing list. You’ll learn which documents to verify, how to prepare insurance, money and phone service, what belongs in your carry-on, how the international arrival process usually unfolds, and how to reach official transport without accepting help from unsolicited drivers. Use IATA Timatic, your airline, government guidance and destination health advice for the final check: passport-validity, visa, onward-travel and health rules depend on your nationality and itinerary, and can change close to departure.
Quick answer: Prepare in five moments: verify entry and health requirements before booking; organise documents, insurance, money and phone service before departure; keep essentials in your carry-on; follow immigration, baggage, customs and official-transport procedures after landing; and keep the first day simple. Check IATA Timatic, airline and government guidance for your exact nationality and itinerary, because missing documents may lead to denied boarding.
The essentials: five checks that matter most before your first trip abroad
A first international trip becomes much easier when you separate fixed preparation from rules that belong to a particular destination. Your passport, payment backup and carry-on plan are broadly useful anywhere; visa eligibility, passport validity, onward-ticket requirements, health documents, airport procedures and phone connectivity depend on your nationality, route and dates. Treat the general checklist below as a framework, not permission to skip the final official checks.
Before booking: confirm that you can enter

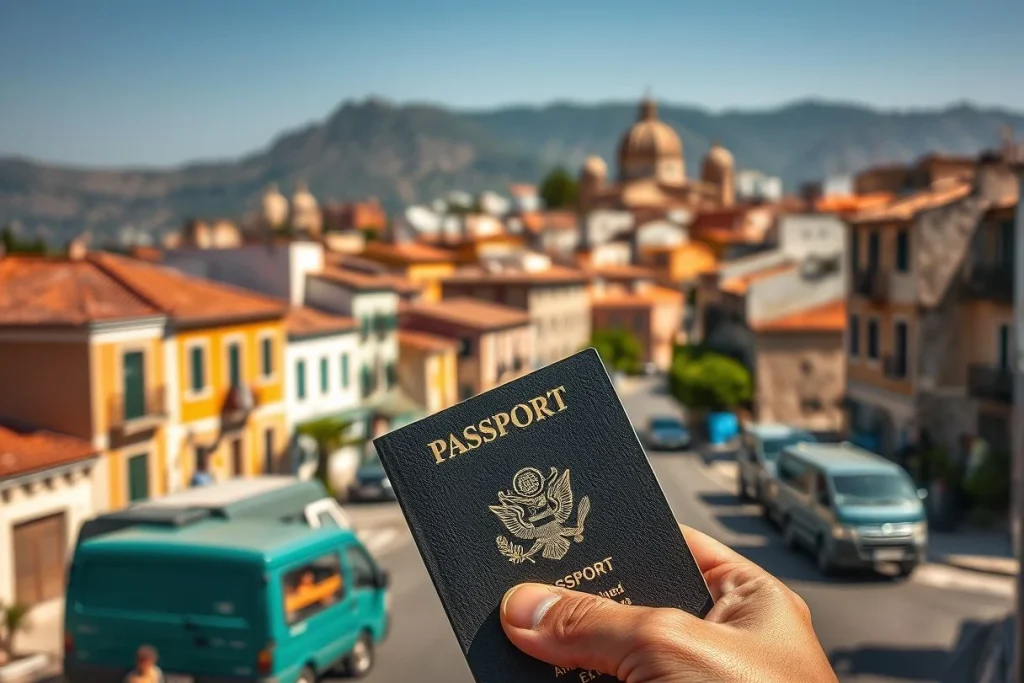
Start with your passport. Many destinations require it to remain valid for at least six months beyond a relevant travel or return date, but the exact rule varies by destination and nationality. Check your passport’s expiry date against the entry conditions for every country on the itinerary, including transit countries. The U.S. Department of State explains passport-validity considerations for American travellers, while other nationalities should use their own government’s guidance.
Then check whether you need a visa, electronic travel authorisation, transit permission, proof of onward travel or specific health documentation. The IATA Travel Centre draws on the travel-document information used for airline checks, so it is a useful starting point alongside the destination’s embassy, immigration authority and your airline. Enter your exact nationality, passport type, departure point, transit points and travel dates; a rule for a direct flight may not apply to a route with a connection.
Do this before paying for a non-refundable trip where possible. Missing documents can lead to denied boarding, and an apparently valid visa may not cover a transit country or a different passport nationality. Recheck the information close to departure because entry, health and documentation requirements can change.
Before departure: protect the essentials

Make one physical and one digital set of key records: passport identification page, visa or authorisation, flight and accommodation details, emergency contacts and travel-insurance information. Store digital copies somewhere you can reach without the original phone or wallet, and keep the paper copies separate from your passport. The CDC Yellow Book recommends keeping important medical and insurance information available when travelling abroad.
Insurance deserves more attention than a generic “covered” label. Check whether the policy includes emergency treatment and medical evacuation, then read exclusions, limits, pre-existing-condition terms and cancellation or disruption cover. A policy that reimburses a small lost item is not necessarily suitable for a serious medical emergency overseas; compare the wording with your itinerary and activities.
Health preparation is destination-specific. Consult the CDC Travelers’ Health vaccine guidance, your destination’s health authority and, when appropriate, a travel clinic. The CDC advises arranging recommended vaccines or a travel-health appointment at least four to six weeks before departure when possible. That lead time also gives you a chance to discuss regular medicines, prescriptions and conditions that may need planning abroad.
Decide how you will stay connected before leaving home. If you plan to use an eSIM, confirm that your phone is compatible and that the service covers the countries on your route; if you will buy a local SIM card, check whether your phone can use one and keep a way to access booking and emergency information offline. Save your accommodation address, airport transport instructions and important phone numbers before take-off rather than relying on a signal immediately after landing.
At the airport: make security predictable

Keep your passport, boarding pass, medication, phone, charger, glasses and any essential documents in one accessible part of your carry-on. Add one change of clothes and basic toiletries in case checked luggage is delayed. Do not put irreplaceable medication, travel documents or your only payment method in checked baggage.
Security procedures differ by airport. For a U.S. departure, the TSA travel checklist describes the 3-1-1 liquids rule: containers of up to 3.4 ounces or 100 millilitres in one quart-sized bag, subject to exceptions and current airport guidance. This is U.S.-departure guidance, not a universal rule for every airport, so check the airport or airline instructions for other departure points.
Allow enough time for your airline’s recommended international check-in and the airport’s queues, security process and distance to the gate. Your airline and departure airport are the right sources for the current arrival recommendation; busy periods, connections, accessibility needs and checked baggage can all change the practical margin you need. Keep the gate and boarding information visible, but do not assume that a familiar domestic-airport routine will apply.
First two hours after landing: follow the sequence

International arrival is usually a sequence rather than a puzzle: follow signs to immigration or passport control, collect checked baggage, pass customs and then continue to ground transport. Airports may use different combinations of digital declarations, photographs, fingerprints or other biometric steps depending on the airport and your nationality. The U.S. Customs and Border Protection arrival information illustrates why procedures should be checked for the actual airport rather than assumed from another trip.
Keep your passport and any required arrival documents ready until you have cleared the relevant checks. If an officer asks about accommodation, onward travel or the purpose of the visit, answer plainly and consistently with your documents. After baggage and customs, pause in the public arrivals area to orient yourself before accepting help or changing money.
Use the airport’s official taxi rank, a clearly identified airport bus or rail service, or a ride-hailing app according to the airport’s published instructions. Do not follow unsolicited drivers through the terminal or get into a vehicle because someone says it is the official taxi. If the airport’s instructions are unclear, ask at the official information desk or transport counter, not a stranger who approaches with an offer.
First day abroad: keep money and decisions simple

Use a two-card-plus-cash plan. Carry two payment cards from different accounts or issuers, keep them separately, and have a modest amount of local cash for an arrival purchase or transport. The right amount depends on the destination and your arrival plan; check current local payment advice rather than carrying a large sum.
Before departure, ask your card issuer about foreign-transaction fees and confirm that your contact details are current. A card without foreign-transaction fees, where available, can reduce avoidable costs, but the card issuer, ATM operator and merchant may still apply their own charges. If a terminal or ATM offers to convert the payment into your home currency, compare the option carefully; Visa’s guidance explains that you can generally choose to be charged in the local currency instead of accepting dynamic currency conversion.
On the first day, use the simplest reliable plan: reach your accommodation by an official route, confirm how to access the room, buy or activate connectivity, and take a short walk only after you have rested and secured your documents. Keep the first meal and transport choice straightforward. A calm first evening gives you time to check local etiquette, transport instructions and the next day’s route with a working phone, charged battery and known address.
Tips in detail: a five-moment international travel checklist
Moment 1: Before booking
- Check your passport against the destination’s rule. Many destinations require the passport to remain valid for at least six months beyond the relevant travel or return date, but the six-month rule is not universal. Check the requirement for your nationality and destination through the IATA Travel Centre, your government’s foreign-affairs service and the destination’s official immigration authority. Make sure the passport has enough blank pages if the relevant authority requires them.
Why it matters: A passport that looks valid to you may still fail an airline document check, and missing documents can lead to denied boarding. - Verify every entry requirement before paying for the trip. Use IATA Timatic, the airline’s document guidance and official government sources to check visa or electronic authorisation requirements, permitted length of stay, proof of onward travel and health documents. An onward ticket is proof that you plan to leave the destination; some destinations may require it even when a visa is not needed. Check each transit country separately, including places where you only change planes.
Why it matters: Rules apply to your nationality, itinerary and travel dates—not simply to the passport you hold or the country where you bought the ticket. - Build accessibility, medication and connection needs into the booking. If you use mobility equipment, need assistance at the airport or travel with prescription medicine, ask the airline and relevant airport what arrangements or documents are required. For connecting flights, allow realistic time for a terminal change, a new security check, immigration or a baggage recheck rather than choosing a connection based only on its low fare. Save the airline’s document requirements with your booking.
Why it matters: A first international itinerary has more handoffs than a domestic one. Extra time and confirmed assistance reduce the chance that one delay becomes a missed flight or an unmanageable airport transfer.
Moment 2: Before departure
- Make a document set in two formats. Print copies of the passport identification page, visa or travel authorisation, itinerary, insurance policy, prescriptions and emergency contacts. Store encrypted digital copies in a secure account that you can access without relying on the phone’s photo gallery, and leave a copy with a trusted person at home. Keep the originals in your carry-on, not checked baggage.
Why it matters: A copy cannot replace a passport or visa, but it gives an airline, insurer, police officer or embassy useful information if an original is lost. The CDC also recommends keeping printed and digital copies of important travel documents. - Read the insurance policy, not only the headline. Check the limits and exclusions for emergency treatment, medical evacuation, pre-existing conditions and activities you plan to do. Also look for cancellation, interruption and travel-disruption terms, and note the assistance number and claim process. Medical evacuation means arranging and paying for transport to an appropriate medical facility when local treatment is not sufficient; it is different from ordinary medical treatment.
Why it matters: Travel medical insurance varies sharply between policies. The useful question is not simply whether you are “covered”, but what the insurer will pay, in which circumstances and how you must contact it. - Book health advice early. Consult a travel clinic or other qualified health professional about destination-specific recommendations and medicines. The CDC advises arranging recommended vaccines or a travel-clinic appointment at least four to six weeks before departure when possible; consult CDC Travelers’ Health, the CDC vaccine guide or your national health authority. Keep prescriptions in their original packaging and check the destination’s medicine rules separately.
Why it matters: Some advice takes time to complete, and health requirements can change. General travel advice is not a substitute for guidance based on your health and itinerary. - Prepare a two-card money plan. Check your bank’s current foreign-transaction fees, overseas withdrawal limits and fraud-alert procedure. A card without foreign-transaction fees, where available, can reduce avoidable costs; carry a second payment method separately from the first. Take a small amount of local cash for immediate transport, food or a minor purchase rather than assuming every airport or taxi accepts cards.
Why it matters: Your first payment may fail because of a security block, a damaged card or a poor connection. Separation matters: losing one wallet should not remove every way to pay. - Choose connectivity before you leave. An eSIM is a digital SIM profile downloaded to a compatible phone; a local SIM is a physical card bought in the destination. Check that the phone is unlocked, confirm the plan’s destination coverage and data limits, and save activation instructions offline. Keep your usual number or messaging access in mind if banks use it for verification.
Why it matters: Connectivity helps with the arrival address, transport instructions, translation and emergency contact. Installing or activating it before landing is easier than trying to solve the problem beside an unfamiliar arrivals hall. - Use official traveller-registration services where relevant. Eligible U.S. travellers can consider the U.S. Department of State’s Smart Traveler Enrollment Program (STEP). It is U.S.-specific; other nationalities should check their own government’s overseas-travel service.
Why it matters: Government registration and advisory services differ by country, so this is an additional information tool, not a replacement for checking entry rules or buying insurance.
Moment 3: At the airport and on the first international flight
- Arrive according to the airport’s demands, not a universal number. Allow time for check-in, airline document checks, baggage drop, security, passport control where applicable, a long walk to the gate and seasonal queues. Add time if you are checking a bag, travelling during a busy period, need assistance or are unfamiliar with the airport. Confirm the airline’s current recommendation and check the airport’s official guidance before leaving home.
Why it matters: International departures can involve more checks than a domestic flight. A precise “always arrive three hours early” rule sounds reassuring but cannot account for every airport, route or passenger. - Read the departure screen in sequence. Match the flight number and destination, then note the check-in or bag-drop counter, gate and any “go to gate” or document-check message. Gates can change, so check the screen again after security and keep the passport accessible until boarding is complete.
Why it matters: Airport screens are organised around flight numbers, not only city names. Reading the number prevents confusion when several flights leave for similar destinations or use codeshare airlines. - Pack the essentials in your carry-on. Put the passport, required entry documents, medicine, glasses, valuables, charger, power bank in line with the airline’s rules, snacks, a pen and any essential contact details within easy reach. Carry an empty water bottle if useful and fill it after security where facilities allow; keep basic toiletries in a container that meets the departure airport’s current rules. For departures from the United States, TSA’s 3-1-1 guidance allows liquids in containers of up to 3.4 ounces or 100 millilitres in one quart-sized bag, subject to exceptions and current airport guidance. This is U.S.-departure guidance, not a universal global rule; check the airport you are using.
Why it matters: Checked bags can be delayed, while items such as medicine and documents cannot be replaced easily during a connection. - Use the flight to set up the arrival, not to improvise it. Keep the passport and arrival documents together, adjust your watch or phone to the destination time when convenient, and save the accommodation address and transport instructions offline. If an arrival form asks for information, read it carefully and answer according to the official instructions.
Why it matters: The first airport conversation may happen after a long flight, with limited data and little privacy. Having the address and documents ready makes a basic process feel manageable.
Moment 4: The first two hours after landing
- Follow the airport sequence: immigration, baggage, customs, then transport. Immigration is the border-control stage where an officer or system checks your passport and permission to enter. Customs concerns goods you are bringing into the country. Follow signs to immigration, present the requested passport and documents, collect your baggage, complete any customs declaration and then continue to arrivals.
Why it matters: Airports may add biometrics, photographs, fingerprints or digital immigration systems, and the process varies by airport and nationality. In the United States, U.S. Customs and Border Protection is an example of the authority handling arrival controls; its process should not be treated as a worldwide template. - Activate your phone before leaving the arrivals area. Connect to airport Wi-Fi or use the eSIM or local SIM prepared earlier. Confirm that maps, the accommodation address, your booking and the transport app work before walking outside or accepting help from a stranger.
Why it matters: The arrivals hall is the wrong place to discover that a phone is locked, a QR code is inaccessible or the hotel address was saved only in an offline account you cannot open. - Use only identified transport channels. Go to the airport’s official taxi rank, marked transport desk or verified ride-hailing pickup point. Match the vehicle, driver and licence details shown by the official service, and ignore unsolicited offers inside the terminal. If the airport publishes a transport map or instructions, follow those rather than a stranger’s directions.
Why it matters: Unofficial drivers and inflated fares are reported in many destinations, but the exact scams vary. The airport’s own channels provide a clearer way to identify the service you have chosen. - Withdraw cash cautiously. If you need money, use an ATM inside the airport or another reputable, well-lit location, inspect the machine briefly and shield your PIN. Decline help from strangers and keep the card and cash secure immediately afterwards.
Why it matters: ATM skimming, distraction theft and payment disputes are destination-specific risks. A short, deliberate transaction is safer than rushing because someone is watching or offering assistance.
Moment 5: The first day abroad
- Test the basics before adding plans. Send a safe-arrival message, confirm the hotel route, test mobile data and make one small payment. Identify the nearest pharmacy or clinic and save the local emergency number from an official source. Keep the passport in a secure place, carrying an accepted copy where appropriate, and follow the accommodation’s advice on local document requirements.
Why it matters: Small tests expose problems—an inactive SIM, a declined card or an incomplete address—while you are still close to help. - Choose local currency at the terminal. When a card machine or ATM offers to convert the charge into your home currency, compare the options carefully. Visa explains that dynamic currency conversion is a merchant or ATM conversion offer; you can generally choose to be charged in the local currency instead. Your card issuer may still apply its own fees, so check its terms before departure.
Why it matters: Accepting a familiar currency does not automatically mean receiving the better exchange rate. Local-currency payment keeps the conversion with your card issuer rather than accepting an unfamiliar on-the-spot conversion. - Learn one etiquette rule before going out. Check whether local customs affect clothing, photography, tipping, religious sites, public transport or eating. Ask the accommodation or an official visitor source when advice is unclear, and follow signs rather than copying the loudest group nearby.
Why it matters: Etiquette is local, not a universal travel skill. One researched adjustment can prevent an avoidable misunderstanding on the first day. - Have a loss plan written down. If a card disappears, contact the issuer, use the separate backup method and follow its emergency replacement process. If the passport is lost, report it to local authorities or the relevant embassy or consulate as appropriate, using the document copies and insurance information you prepared. Do not keep every original and backup in one bag.
Why it matters: Stress makes phone numbers and policy details difficult to find. A printed copy and a separate digital record turn a crisis into a sequence of calls and reports.
Common mistakes to avoid on a first international trip
Check rules before you book
Mistake: booking first and checking entry rules later. A flight can be perfectly valid for your passport but not for your transit point, visa status or onward itinerary. Before paying, check the destination and transit requirements for your nationality and dates through the IATA Travel Centre, your airline and the relevant government authority. IATA says its Timatic information is used for passport, visa and health-document checks, and missing documents can lead to denied boarding.
Correction: Confirm passport validity, visa or visa-waiver conditions, transit permissions, proof of onward travel and any required health documents for the exact itinerary. Six months of validity is common, but it is not a universal rule: many destinations apply it beyond a relevant travel or return date, while others use different requirements. Treat the official result for your passport as the answer, not advice from a friend who travelled on another nationality.
Do not leave health and cover until the final week
Mistake: arranging vaccines, prescriptions or insurance just before departure. Health recommendations depend on the destination, your activities and your medical circumstances. The CDC advises planning travel vaccines ahead; when possible, arrange a travel-clinic appointment four to six weeks before leaving. A last-minute appointment may leave less time for a recommended course or for checking whether medication documentation is needed.
Correction: Read the destination guidance, speak to a qualified clinician and carry prescriptions in your hand luggage. Check travel medical insurance for emergency treatment, medical evacuation, cancellation or disruption cover and exclusions, including pre-existing conditions. Policy wording matters more than the headline promise; the CDC Yellow Book also recommends understanding how you would obtain care abroad.
Protect the documents and money you depend on
Mistake: relying on one phone, one card or one copy of a document. A dead battery, blocked card or lost bag can turn a small problem into a day without access to money or identification. Keep your passport, visa evidence, insurance details and essential contact numbers accessible in your carry-on, with a printed set stored separately from the originals and a secure digital copy available independently of one device.
Correction: Carry two payment methods from different accounts or issuers where possible, and keep them in separate places. A card with no foreign-transaction fee can reduce avoidable costs where available, but check your issuer’s terms before departure. Keep a modest amount of local cash separate from your main wallet rather than carrying all cash together; the right amount depends on the destination and your first transport and meal plans.
Mistake: accepting every currency conversion offered at an ATM or card terminal. A machine or merchant may offer to charge your card in your home currency through dynamic currency conversion. Visa explains that travellers can generally choose local-currency billing; compare the displayed amount and terms before accepting.
Correction: When given a clear choice, select the local currency and let your card issuer handle the conversion, while remembering that issuer fees and local ATM charges can still apply. Never hand your card to an unofficial person offering to “help” at a cash machine. If a card is blocked, use the second method, contact the issuer through its official number or app and record the incident promptly.
Pack for the first problem, not just the flight
Mistake: placing medicine, valuables, documents and all essential clothing in checked luggage. Bags can be delayed, and retrieving them may take time. Keep your passport, medication, glasses, charger, one change of clothes, basic toiletries and any item needed during the first day in your carry-on. Do not pack a passport or irreplaceable document in checked baggage.
Mistake: treating the U.S. liquids rule as a worldwide airport rule. For departures from the United States, TSA’s guidance describes the 3-1-1 rule: containers of up to 3.4 ounces or 100 millilitres in one quart-sized bag, subject to exceptions and current airport guidance. Other countries and airports may apply different screening procedures. Check the departure airport’s official instructions instead of assuming the U.S. rule applies everywhere.
Use official transport after landing

Mistake: following an unsolicited driver who approaches inside the terminal. A person who says your taxi is unavailable or asks to see your booking may not be connected with the airport. The safer correction is procedural rather than improvised: follow signs to the official taxi rank, airport desk or designated pick-up area, and use a recognised ride-hailing app only where the airport and local authorities permit it.
Check the airport’s official transport page before departure so you know the authorised meeting point and the name or booking process to expect. After landing, follow the airport sequence for immigration, baggage collection, customs and onward transport. These steps vary by airport and nationality; some arrivals may involve photographs, fingerprints or digital immigration systems, so do not assume a previous airport’s process will be repeated.
Leave room for the first day

Mistake: assuming your phone, card and ride-hailing app will work immediately. Roaming may be expensive, an eSIM may require a compatible unlocked phone, and local SIM registration or payment acceptance can vary. Download essential booking details and an offline map before leaving, save the address of your first accommodation in writing and keep enough information to reach it without mobile data.
Correction: Decide before departure whether an eSIM, local SIM or roaming plan suits your phone and destination. Confirm how you will pay for the first journey, and identify an official backup such as the airport taxi rank or public transport information desk. Do not rely on a single app for directions, translation, payment and transport at once.
Mistake: scheduling a tight itinerary immediately after arrival. Immigration queues, baggage delays, unfamiliar roads, time-zone changes, strikes and weather disruption can all alter the first few hours. Leave a buffer around the airport transfer and make the first day deliberately light: reach the accommodation, eat, obtain essentials and learn the nearby route before committing to timed activities.
Check disruption notices, extreme-weather warnings, strikes and seasonal closures for the actual destination and dates. These are not universal travel rules, so use the airline, airport, transport operator and local authority as the final sources.
If something goes wrong

- Lost baggage: report it at the airline’s baggage desk before leaving the airport, keep the reference number and use your carry-on essentials while the case is traced.
- Blocked card: switch to your separated backup, contact the issuer through an official channel and avoid repeatedly entering a PIN or sharing account details with strangers.
- No phone signal: use the printed accommodation address and saved confirmations, connect to an authorised airport network or information desk, and follow official transport signs rather than accepting an unsolicited lift.
- Missed connection: go first to the airline or booking provider’s official service desk, preserve your ticket and baggage information, and ask for the confirmed rebooking options before arranging a separate journey.
These responses will not remove every delay, but they keep the decision-making simple. Recheck entry, health and transport information close to departure: requirements can change, and the IATA Travel Centre, airline and relevant government sources are more reliable than an old social-media post.
Conclusion: prepare in stages, then rehearse your arrival
Turn the checklist into three short passes rather than one large task. First, verify your passport validity, visa or entry permission, transit requirements and health guidance for your nationality and exact itinerary. Use the IATA Travel Centre, your airline, the relevant government authorities and destination health guidance. Many destinations require at least six months of passport validity beyond the relevant travel or return date, but the rule is destination-specific.
Next, build your practical backup system. Put your passport, visas, insurance details, flight and accommodation information, emergency contacts and any prescriptions in one carry-on folder, with secure digital copies as well. Check that your travel medical insurance includes emergency treatment and medical evacuation, and confirm exclusions before you rely on it. Arrange recommended vaccines or a travel-clinic appointment early when possible; the CDC advises planning around four to six weeks before departure.
Finally, write the first two hours of the trip as a simple sequence: immigration, baggage collection, customs, an official airport transport option and the address of your accommodation. Save the route and booking details before take-off, and know where you will get connectivity and a small amount of local currency. At the airport, follow signs and staff instructions; after landing, use an official taxi rank or recognised ride-hailing app rather than an unsolicited driver.
Your next step is practical: create a single trip folder today and fill in the passport, insurance, flight, accommodation, transport and emergency-contact details. Then perform one final Timatic, government, airline and health-guidance check close to departure. Entry and health requirements can change, but a verified folder and a rehearsed arrival plan remove much of the uncertainty from a first international trip.
Frequently asked questions
What should I do if my first flight includes an international connection?
Check the complete itinerary—not only the final destination—through your airline and IATA Travel Centre before departure. Transit, visa and health-document requirements can depend on your nationality, route and dates, and missing documents can lead to denied boarding. At each airport, follow the posted immigration, baggage, customs and onward-transport instructions rather than assuming the connection will work the same way as a domestic transfer.
How can I keep my phone working as soon as I land?
Decide before departure whether an eSIM or a local SIM is suitable for your phone and destination, then check the provider’s current instructions and compatibility requirements. Save essential travel details in digital and printed form so you are not dependent on mobile data immediately after landing. For airport transport, use official channels even if an unsolicited driver offers help.
What is the safest way to carry prescription medicine abroad?
Check destination-specific health and entry requirements before travelling, because some itineraries may require health documentation. IATA Travel Centre and official government health guidance are useful starting points; a travel clinic can advise on your destination and timing. Also review your travel medical insurance for emergency treatment, medical evacuation and relevant exclusions, as policies differ.
What should I do if my checked bag does not arrive?
Stay in the airport and follow the airport or airline’s official baggage procedure before continuing to customs or onward transport. Keep your baggage information and travel documents available, and use the airline’s official channel for the next instruction. Your arrival plan should already allow time for immigration, baggage and customs rather than scheduling an immediate, inflexible transfer.
How can I manage a language barrier during my first overseas trip?
Prepare key information in both printed and digital form, including your passport identification page, visa and insurance details. Keep the name and address of your accommodation and your onward-transport plan accessible, then use official airport transport channels instead of relying on unsolicited explanations. Destination-specific government and airport guidance should take priority over informal advice when instructions are unclear.
What should I do if I feel overwhelmed after landing?
Reduce the first decision to a sequence: immigration, baggage collection, customs, then onward transport. Follow airport signs and official instructions, pause in a public airport area to check your documents and plan, and use the airport’s official transport channel rather than an unsolicited driver. Keeping printed and digital copies of essential documents can make this first hour easier to manage.